While I have a pretty good collection of hats, I have always secretly harboured a hat want-list. This stretches from one of those opera hats with the giant horns to a replica of the slouchy red cap sported by the majority of garden gnomes and of course a Princess Leia hat.
A quick Princess Leia side project led to my first stab at millinery (which led to several accidental stabbings of my head with pins, as I fitted the hat directly onto my head).
I started out with the idea of having three large triangles sewn together in a cone. I then folded under the point of the cone until it fit to my head and pinned the ends of the triangles to fit.
While wearing the hat prototype, I drew on where my eyebrows were to create the brow line, and traced around my ears. I also lengthened the back by a good three inches.
Once I cut out the pieces, I sewed them together and realized the front was a bit loose. My muslin had not an ounce of stretch unlike the coat lining fabric I used for the actual hat! I added a seam in the front and put some elastic along four inches of the hem in the back to add a gather.
Finally I cut four inch wide stripes for the cinammon buns, sewed them together, turned them inside out and stuffed them. I sewed the first two buns together and firmly attached them to the hat, resulting in a semi-adorable monkey effect. The additional stuffed strips were sewn onto the bun that was already on the hat so it would stand up from the bun rather than the hat and still be firmly on!
And that was that! Now the people on my bus route are treated to Princess Leia every morning on their daily commute and my ears are mighty warm under those huge buns!
Sunday, January 16, 2011
Friday, January 7, 2011
Colette Wrap Dress Sew-Along
Crepe Sew-Along 2010!
As an avid reader of Gertie's New Blog For Better Sewing, I have longingly followed along with her last sew-along - a beautiful Lady Gray winter coat whose construction was so clearly out of my sewing ability that I simply watched.
However, my time has come! Gertie is holding a beginner sew along on a Colette pattern wrap dress:
Available online at www.colettepatterns.com/shop/crepe , this is a simply wrap dress with the wrap in the back. Always a sucker for a sweetheart neckline, I signed up with my sewing buddy Maddy!
Stayed tuned for the upcoming muslin experiences, in which I will be tacking inches onto the pattern in order to fit all six feet of me - yes, I am six feet tall. Blame all the KD I consumed as a child. I still get a little misty-eyed at the sight of powdered 'cheese'.
Holiday Fudge!
Inspired by the wonderfully delectable photographs of Andrew Lewis' fudge on Craftzine { http://blog.craftzine.com/archive/2010/11/fudge_recipes.html }, I tried my hand at fudge once more.
My first attempt at fudge was as an impatient twelve year old. Having found the recipe as part of an Anne of Green Gables book, my mom and I set out to make the fudge. After what seemed like between four to six hours of stirring drudgery, I gave up on the idea of the fudge ever setting and resorted to eating it with spoons.
This second attempt went much more successfully.
To create this fudge yourself I highly recommend reading through Andrew's methodical steps - it's more than the slapdash methodology you'll get here!
Along with the ingredients below, you'll need a working stove or alternative source of flame, a pot, wooden spoon, a bowl of cold water, spatula, electrical beaters for the brave of heart, a 9x13ish pan lined with parchment or waxed paper for the end result and several fudge sycophants who nod along with you as long as you keep the fudge coming.
Gathering all my ingredients together led to an immediate discovery: if you are shocked to find a sole can of evaporated milk in your pantry, it is probably as old as your place itself. Case in point - mine expired in 2003. Get ye to a grocery store and buy a new can of evaporated milk. While some people may have read the expiration date handily labeled on the top of the can, I prefer the method of opening the can immediately followed by gagging and several exclamations of 'What is that smell?1?'.
Anyways. Moving on. I'm following the basic outline of Andrew's chocolate fudge:
2 cups of sugar
half a can of evaporated milk
1/4 cup or so of butter (butter never hurts)
2 tbsp. of water
and then the chocolate content.
Of course, what's the point of trying out a new recipe without some immediate tweaking? The major alteration to the original recipe I decided was to add a healthy handful of good chocolate chips to the mix, and reduced the 6 tablespoons of cocoa to 3 tablespoons.
I set myself up on the stove with my bowl of cold water next to the pot for checking the fudge consistency.
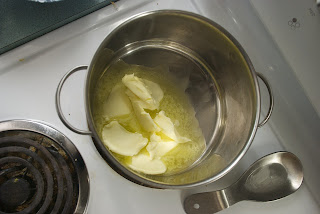
Turn the pot on medium heat and begin chucking in all the ingredients in rapid succession. Stirring helps.
Once everything melted together, I turned the timer on for ten minutes and used my wooden spoon to stir continuously - and I do mean continuously as in round and round and round with no stopping while it bubbles away.
Now at this point most intrepid fudge-making bloggers would set up some kind of tripod-mounted stop-motion recording of their fudge cooking away. I instead chose to call my sister and talk for fifteen minutes straight about all kinds of important life-altering events and current politics, including at least one summary of the latest 'How I Met Your Mother' re-run.
Andrew has some lovely photos of his fudge. How he managed the constant stirring and taking of photographs is beyond me - clearly some ambidextrous skills coming out to play.
I beat my fudge with the electric beaters on medium for exactly five minutes, at which point I poured it into the 9x13 pan and cut it into squares.
While some samples survived to be tried by my sewing buddy Maddy, most were immediately demolished as it was both delicious AND able to be consumed with implements beyond fingers.
Fudge accomplishment unlocked!
Subscribe to:
Posts (Atom)